T H I R T Y

T H I R T Y

I have always looked forward to being thirty! I don’t have a concrete answer as to why, it just seems like thirty is when you become a real person, you know what I mean? It’s all the sudden you are of value to the world, you have real ideas, and maybe headed somewhere in life.. I don’t know it just seems romantic to me, the notion of being THIRTY. It’s a milestone perhaps, either way it’s a milestone that I’ve always looked forward to. I will say this, I believe I’m alone in that feeling, out of everyone I have spoken to that has passed the thirty threshold, they all seemed to REALLY dislike turning thirty, for one reason or another. Who knows maybe I’m to naive to see what that saw!

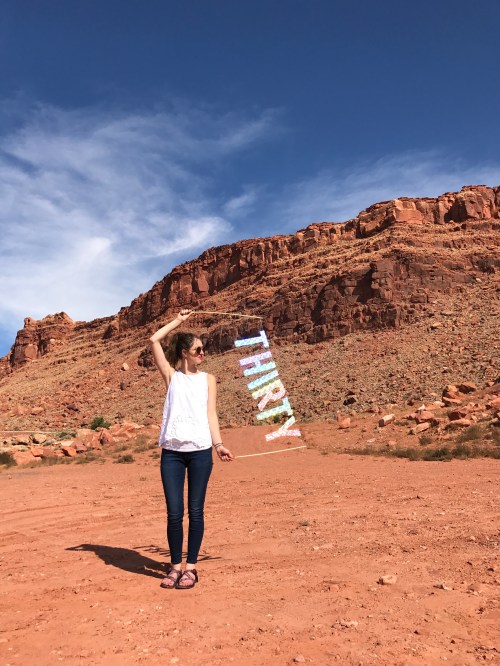
For my big 30, I wanted to do the classic highway 89 road trip. I’ve lived in northern Utah all my life and the furthest south in the sate I’ve made it was Moab. I had to put an end to that, so I pack up the car made a prop and nagged my husband to come with (he didn’t see the charm in it) I wanted to be surround by serene beauty for my milestone birthday! I took loads of pictures and made a small of edit of some clips (very amateur, but F U N) you can watch the one minute video here https://www.youtube.com/watch?v=yjo6DF-5m2E

img_9982img_0376img_0392IMG_0404 (1).jpgimg_0413img_0442img_0824img_0462img_0548img_0574img_0760img_0767

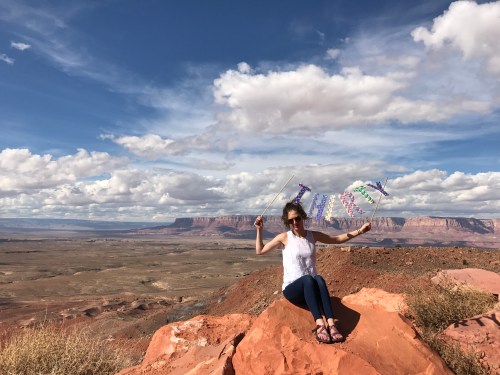
Look at how good I am at being Adult!!!

The only place i didn’t take my sign was antelope canyon (close quarters in there) but hands down one the coolest things I’ve seen. The only bad thing bad that happened was I drowned my birthday cupcakes in the cooler, so I had a cake-less birthday, everything else was one hundred percent okay! especially this fun little video, check it out here watch the one minute video here https://www.youtube.com/watch?v=yjo6DF-5m2E

We went to Arches National Park, Monument Valley, Valley of the Gods, Horseshoe Bend, Antelope Canyon, Grand Canyon, and Bryce Canyon. It was seriously a good time, definitely a must see area!

I seriously Had a blast. I could do this same trip every year and not be sick of it. It really is amazing this place I (we) live, The world is crazy cool. Am I crazy for thinking that THIRTY is crazy cool too? I suppose we will just have to see what thirty has in store for me!

$3.00 Bathroom Makeover

$3.00 Bathroom Makeover

The bathroom in my studio is in serious need of a MAJOR upgrade. My goal is an entire makeover using supplies I already have laying around. Which I managed to pull off almost…I had to buy a light cover because there wasn’t one in there, but I found one at my local thrift store for $3.00 so I win!

img_9737
This is the Finished Result!!! So fun right!

I started off by cleaning the whole bathroom so the paint would go on smoothly. It was also time for the last tenants baked on scum in the sink to get the heck out of there,After much trial and error I finally got off using some trusty steel wool.

Next I used some left over white paint from a previous project to paint the walls. I had to do three coats and some praying to cover up that dark terracotta color (the door was that same color.) After that was done I added a bit of color here and there, again using paint samples I had left over from many projects.

(Some Before and Afters)………………………………………………………………………………….

img_9632img_9735img_9640img_9694img_9638img_9722

To add some flair I thought it would be fun to add a little good vibes saying that could be read when you were looking in the mirror and that would still look interesting if you weren’t looking at it in the mirror just to have an interesting graphic quality.

img_9651img_9645

(Above) Testing out how “let the good vibes roll” would look best in the mirror.

(Below) The finished product showing it reflected in the mirror.

img_9759img_9659

Lastly I found some fun things around the studio I wasn’t using such as a Fun smiley face yellow garbage can, some art work I had made a while back, and a little nursery rhyme to add some vintage spunk and of course hung the light cover. Lastly I added some greenery because duh! And that is that, new bathroom for $3.00

img_9746

labeledI’m so happy that I took time to fix up this bathroom,

>>>>>>>>>>>>>>>>>>>>       because it was seriously bad.        <<<<<<<<<<<<<<<<<<<<<

img_9642

>>>>>>>>>>>>>>>>>>   and seriously worth it, am I right!    <<<<<<<<<<<<<<<<<<<<<<<

img_9737


Chair DIY

Chair DIY

This chair is an absolute dream I love everything about it, actually that isn’t true. I don’t like the  fabric and the seat it broken I found that out real fast when I sat on it.

I was a bit hasty on this project and I only took one in progress shot (sorry.) Here is what I did. I sanded off the medium stain and put a layer of wax on the wood.I also had to wood blue and screw one of the arms together because it was busted. Next I had to fix the seat, like I said it was broken. I replaced the wood in the seat and recovered it in some silver velvet fabric (it’s seriously so soft) I put the chair back together and bam, beautiful chair!

chair_2layout.jpgimg_0179

This chair is so comfortable my husband and I always fight over who gets to sit in it, good thing I fixed that seat. I can’t wait till I find the next great chair.

hugs and kisses!

My Perfect Ottoman

My Perfect Ottoman

This little guys was sent from the second hand ottoman gods. I had just finished the project from my last post and I just knew it needed a foot rest to complement it.So I went on the prowl and it took me a couple times of going to the second hand store to find it, but there he was!

I liked the fabric that was already on it but the skirt HAD TO GO! I ditched the skirt, you can see in the first photo that I’m taking out the staples. This proved a problem because when I took of the skirt it was left unfinished and the bottom 1 1/2 did not look good. To make it look better I used the skirt fabric to cover up the bottom portion that the skirt had left bear underneath (you can see in the bottom photo how it looks finished.) lastly I wanted the wood color to match the wood of the chair it was going with so I sanded off the dark stain (you can also see the difference in the first and last photo.)

ottoman_layout.jpg

IMG_0161.jpg

Doesn’t he look look great! I know they aren’t the same color but I love the combo so much. It helps that they are in the same hue family and the same type of fabric!

hugs and kisses!

Up-cycled vintage chair

Up-cycled vintage chair

I am a hunter at second hand stores, for real you have to be on the prowl with an open mind if you want to find something that has real hidden potential. I am a fixer my nature, I love testing my abilities. Now let me tell you, upholstery is an ability tester….phew! When I found this little beauty, It was love at first sight. This little sweet pea came upholstered with beautiful gold floral fabric, it was charming, sure, but I just needed to upgrade it so it would last for years to come with more of a timeless feel. Lets take a look.


img_6698

I had already stated working on this chair when I took this picture it, so imagine it with the wood painted a peach color, ( it was not good, I repeat. It had to go!) I started off my stripping and sanding off the paint with my sander. I love love love the metal bar detail! isn’t she charming!

In the next few picture you will see that took off all the fabric and started the upholstering process.  I watched a 40 min tutorial on upholstery and felt like i could do it…I suppose I was feeling confident huh?

chairlayout_2.png

top left going clockwise

This is the chair completely taken apart down to the stuffing which I left on there and reused. Next I cut a big piece of fabric and started to fit it to the seat of the chair. The next picture is showing the back of the chair how I tucked the corners and finished off the seams (not shown, the actual piece of fabric that i used to cover the back of the chair.) The last picture shows the bottom of the chair and how I used the cardboard stripping to give the bottom a secure and nice finish.

Here is the finished project! Honestly it turned out better that I hoped for my first go at upholstery.

img_0146The last step was adding the button detail and hooking on the arm chairs!

img_0138img_0141

I went for a two toned look using a darker mauve tweed fabric for the bottom and a lighter textured velvet fabric on the top. I think the colors complement each other as well as the tone of the wood and the brass bars.

I really love it I hope you do too!

hugs and kisses!


Save

DIY | art storage

DIY | art storage

IMG_0039

Art supplies are awesome, right! But lets face it, keeping track of all your art supplies can is not awesome. If your writing supplies are always disappearing, or look a hot mess like mine then fear no more, I have your back. I’m hear to show you, the simplest, most inexpensive, and cutest DIY you’ve ever seen!

Lets go from this……………………………………………………………to THIS!

pencil_holder_sidebyside.png

  1. Supplies are minimal, a few plumbing pieces (couplings) from the hardware store, they are around  1-2 dollars depending on the size you pick out. Spray paint, I saved money by using the colors I had laying around. Lastly some fun stickers!
  2. Clean the plastic pipes so you can get a good even coat of paint.
  3. Use stickers to create negative space where you want to see through the paint!
  4. Spray paint outside, in light coats of paint so you don’t get drips. Let them chill in the sun until completely dry.
  5. Take off the stickers (I used sharp tweezers) to reveal fun shapes underneath!
  6. Lastly snap in the base into the bottom of the pipe and fill with your favorite art supplies!

Here are a few extra tips, if you don’t have spray paint you can just put fun on stickers or draw with permanent marker to create your own designs (that’s what I did with the cactus holder up above.) Try mixing up the base colors this will keep your holders looking bright and cheery! One more hint, these make the cutest PLANT POTS!

Here are all the steps in picture form, if you’re a visual person like myself.

stepbystep

Easiest cutest things you have ever done! Now lets see them in action! Send me pictures of the ones you make I would love to see everybody’s take!

IMG_0054.jpg

IMG_0033

Waffle Satisfaction

Waffle Satisfaction

Day, after day, I kept having waffle cravings. They wouldn’t go away and I couldn’t help myself, so whats a girl to do? Obviously I went on a massive waffle internet search and came upon these glorious golden waffles. You guys, they are seriously good!

Now hear me out first, I know some people don’t want a “fussy” breakfast recipe, but this isn’t bad and totally worth the extra 3 mins. (keep reading for some tips)

IMG_0083

IMG_3411

IMG_0075

  • 2 cups All-purpose Flour
  • 3 teaspoons Baking Powder
  • 1/2 teaspoon Salt
  • 1/4 cup Sugar
  • 1-1/2 cup Milk
  • 2 whole Egg Yolks
  • 1 Tablespoon Vanilla Extract
  • 1 teaspoon (additional) Vanilla Extract
  • 1 stick (1/2 Cup) Salted Butter, Melted
  • 4 whole Egg Whites

Okay I’m going to give you the most simple and efficient directions, it’ll be a no brainer.

  1. First plug in the waffle iron, and then melt your butter and separate the 2 egg yolks and 4 egg whites.
  2. In a  bowl mix all dry ingredients and in another other bowl mix wet ingredients (but not the butter or the egg whites.)
  3. Next add the wet ingredients to the dry, only mixing them together half way. After that you can add the melted butter to the rest mixing together the rest of way.
  4. Mix your egg whites until stiff peaks form and gently fold them into the mix until they are all combined. Add the finished batter to the hot waffle iron and in about 5 mins you should have golden brown delicious waffles.

(side note, I cut up fresh strawberries and made fresh whip cream) WORTH IT!


Road Trip | Banff Canada

Road Trip | Banff Canada

Hubs and I love to go places together. We live in a small town in Utah and we both feel a bit “over” everything here. A few years ago we started making travel a priority. At first it was hard, we were both in school and we own a small business, so leaving is a challenge. We don’t have any children so we’ve decided to travel while we can! Over the last couple of years we started going more and more often and it became easier and easier and we started venturing further and further from home.

Last week we did a road trip to BANFF, CANADA!!! It looks exactly like whatever pictures come up on Google! It’s one of those places that you can’t take a bad picture of. I’m telling you, if you are a lake and mountain person like I am (apposed to a beach and sand person) Than this place is a must see.

Seriously, this place existsIMG_3313

banff_1.jpg


Ok Ok Ok. lets talk about the highs and lows.

LOWS

1.Our 1990 Vanagon had a bum something-or-other, so we had to take the Prius which is much less roomy, and the seats aren’t as comfy. On the other hand it could be a high because we totally aced on gas mileage.

2. Because of number one our sleeping accommodations weren’t as comfortable. We have a full size bed in the van and the seats in the Prius fold down into, well not a full sized bed.

3. My buns were really hurting after all the hiking. Again could be on the high list because my buns were looking good. (wink)

HIGHS

1.  This is a weird high, but I totally saw two bears, WHAT! It was so cool, one just strolled out from a forest and sauntered right in front of our car to cross the street, we just sat there with our mouths dropped to the floor as we watched it slowly walk down the canyon road. The rest of the trip we kept saying “remember when we saw that bear?”

2. The gross amount of pine trees. New, old, dead, alive, there are billions. See in that picture up there ↑ that’s what it like in every direction, it’s a mountain paradise I tell you.

3. Seeing those clear milky blue glacier lakes was unreal, it never got old. It felt like we were in an amusement park. There is just no way that there can be picturesque lakes every couple of miles in the middle of the Canadian rocky mountains, there is just no way. But I’m wrong, I saw them, they exist.

4. Canoeing on Lake Moraine, I’ll check that off my bucket list now! It really happened.

5. We love making dinner together every night and camping is no exception. We have a Bio-Light Stove (check them out if you haven’t) and it was so much fun! We made pasta meals, potato meals, oatmeal, corn, asparagus, zucchini, tomatoes, peppers and of course our go-to camping favorite chicken apple dogs.

6.Hiking. Now I’m not an avid hiker by any means but I can survive a 2-3 hour hike. It’s a fun way to get some good pictures. We strapped my tripod to the back pack and took some good family photos, check em out!

banff_2.jpg

Ahh, the memories.

For some extra fun here are some other things we did and or saw and or ate.

Italian nachos (yup, those are real) Lake Louise, Peyto lake, Johnston canyon, Marble Canyon, Going-To-The-Sun-Road, Echo Cafe, Banff Skate Park (because we all have our priorities), salt and vinegar chips, Bueno Bars, the one shower I got to take (that was a good day) Two Jack Campground. All the cute people who were 100% better then me at selfies. My endless supply of sunnies and of course the 24-7 time with my hubby.

I would love to answer any questions you have about the area or give suggestions on what to expect or things to do in the area! There is nothing better than a good trip! Heres to the next one! xoxo